This tutorial is based around Nero 7 - There are a lot of choices for burning files to CD's and DVD's, but Nero is my preference - Unfortunatly it's not free.
Recently Nero version 8 was released, but this tutorial should be sufficient to implement the settings on any version.
Click on the 'Nero Burning ROM' icon on your PC and launch the program.
Insert a blank 'writable' CD into your PC's CD recorder.
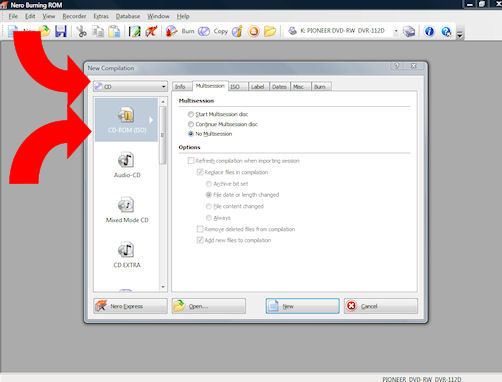
Select New compilation as 'CD' and 'CD-ROM (ISO)' from the first screen.
Nero's first screen.
19. Settings
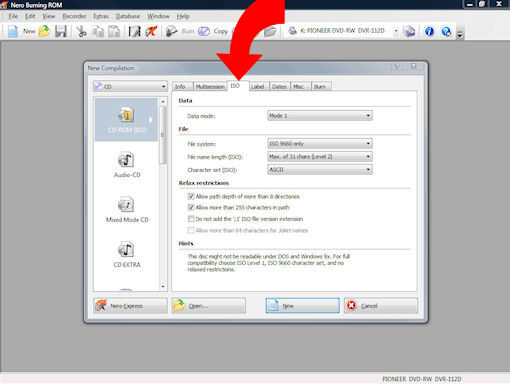
Select the ISO tab - This is where we will change the settings to get the full text file name to display on the SatNav directory screen.
Nero's CD compilation screen.
ISO settings.
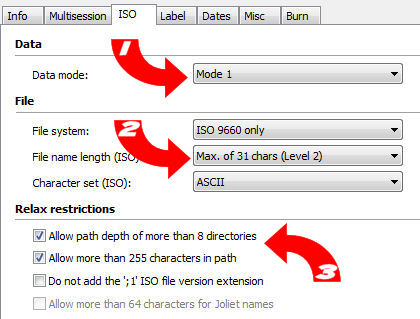
Select the following choices - These are accessed through 'drop down' menu's or simply 'ticking' the selection.
1. DATA - Set to 'Mode 1'
2a. FILE - Set 'File sytem': 'ISO 9660 only'.
2b. FILE - Set 'File name length (ISO)': 'Max. of 31 chars (Level 2)'.
2c. FILE - Set 'Character set (ISO)': 'ASCII'
3a. RELAX RESTRICTIONS - Select 'Allow path depth of more that 8 directories.
3b. RELAX RESTRICTIONS - Select 'Allow more than 255 characters in path.
Click on 'New' to close the screen when done.
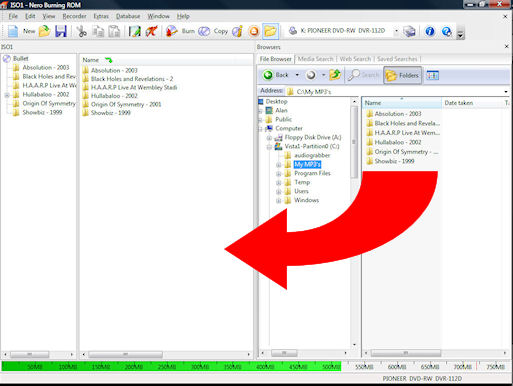
20. Selecting our compilation
All the MP3 albums we've ripped are stored in the c:/My MP3's folder.
Navigate to this folder in Nero's right hand 'browser' screen.
Select the albums you want to record onto CD and 'drag' them over to the left hand screen
On a PC you can do multiple selections by holding down the 'CTL' key and individually 'click' on each album folder.
Drag the files across from the browser window.
At the bottom of the Nero screen a green bar will fill depending upon the number and size of the files you are adding to the CD.
Note that a standard CD will hold just under 700Mb of space.
All the MUSE albums only used 515Mb and that was sufficient for 6 albums having a total of 84 individual tracks.
When done, 'click' on the 'Burn' button at the top of the Nero screen and we're burning.