07. Lets Rip !
 Click on the desktop icon and start Audiograbber. Click on the desktop icon and start Audiograbber.
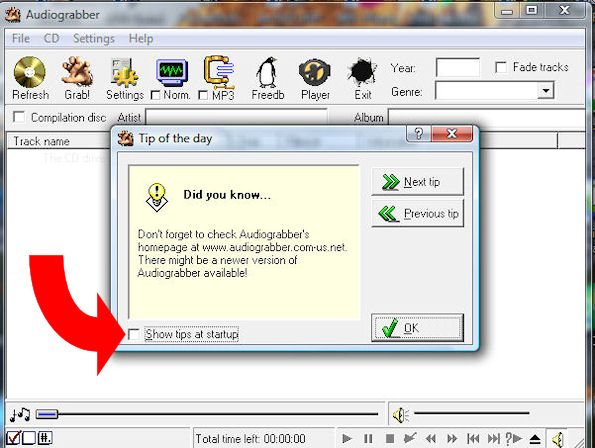
The first screen we see will be for 'tip of the day' - deselect 'Show tips on startup' and select OK.
Installation screens.
08. Brief introduction to the buttons.
 Refreshes the directory list when you insert a new CD. Refreshes the directory list when you insert a new CD.
 Starts your CD to MP3 ripping. Starts your CD to MP3 ripping.
 Access to the detailed settings menu. Access to the detailed settings menu.
 For nomalising your MP3 recordings - (Not used in this tutorial) For nomalising your MP3 recordings - (Not used in this tutorial)
 Access to the codec settings menu. Access to the codec settings menu.
 Uses the internet to automatically insert track names etc. Uses the internet to automatically insert track names etc.
 Built in player - (Not used in this tutorial) Built in player - (Not used in this tutorial)
 Exits the program. Exits the program.
09. Getting the settings right.
We are going to have Audiograbber read our CD, tell us the track names and artist album name. We are then going to ask it to place the MP3 tracks in a folder titled our album name and then copy our tracks to the computer as mp3's adding track names and ID tags so that our Civic disply will list them in all their glory.
And ... we don't want to have to press more than one button to do it all !!
The first setting we shall work on is via access to the codec settings menu.

MP3 Settings screen.
10. MP3 Settings.
Select your settings so that they match the image above - other sub menu's on this screen can remain as default.
1. Direct Rip and Encode to MP3 file - Audiograbber converts to .wav files and then to the
format selected as the encoder. Modern computers are so fast that they do not need to go
through this transition. Intermeadiate encoding also fills the hard drive with unwanted files.
2. Use ID3v1 tags - This is the basic MP3 tag information that the Civic SatNav can understand.
3. Internal Encoder - This is where our LAME software went to ...
4. Constant bit rate - 128 gives good performance with great compression
- meaning more tracks per compilation CD !
5. Joint Stereo - this improves the file compression by not seperating silent noises in each channel.
Go back | Continue to the Settings page
| 

